Chain Multiple Requests
In the previous tutorial we tested that a user can sign up successfully. In this tutorial, we will test that the user can create a note after signing up and see this note in the list of all his notes.
1. Add an HTTP request to post a new note
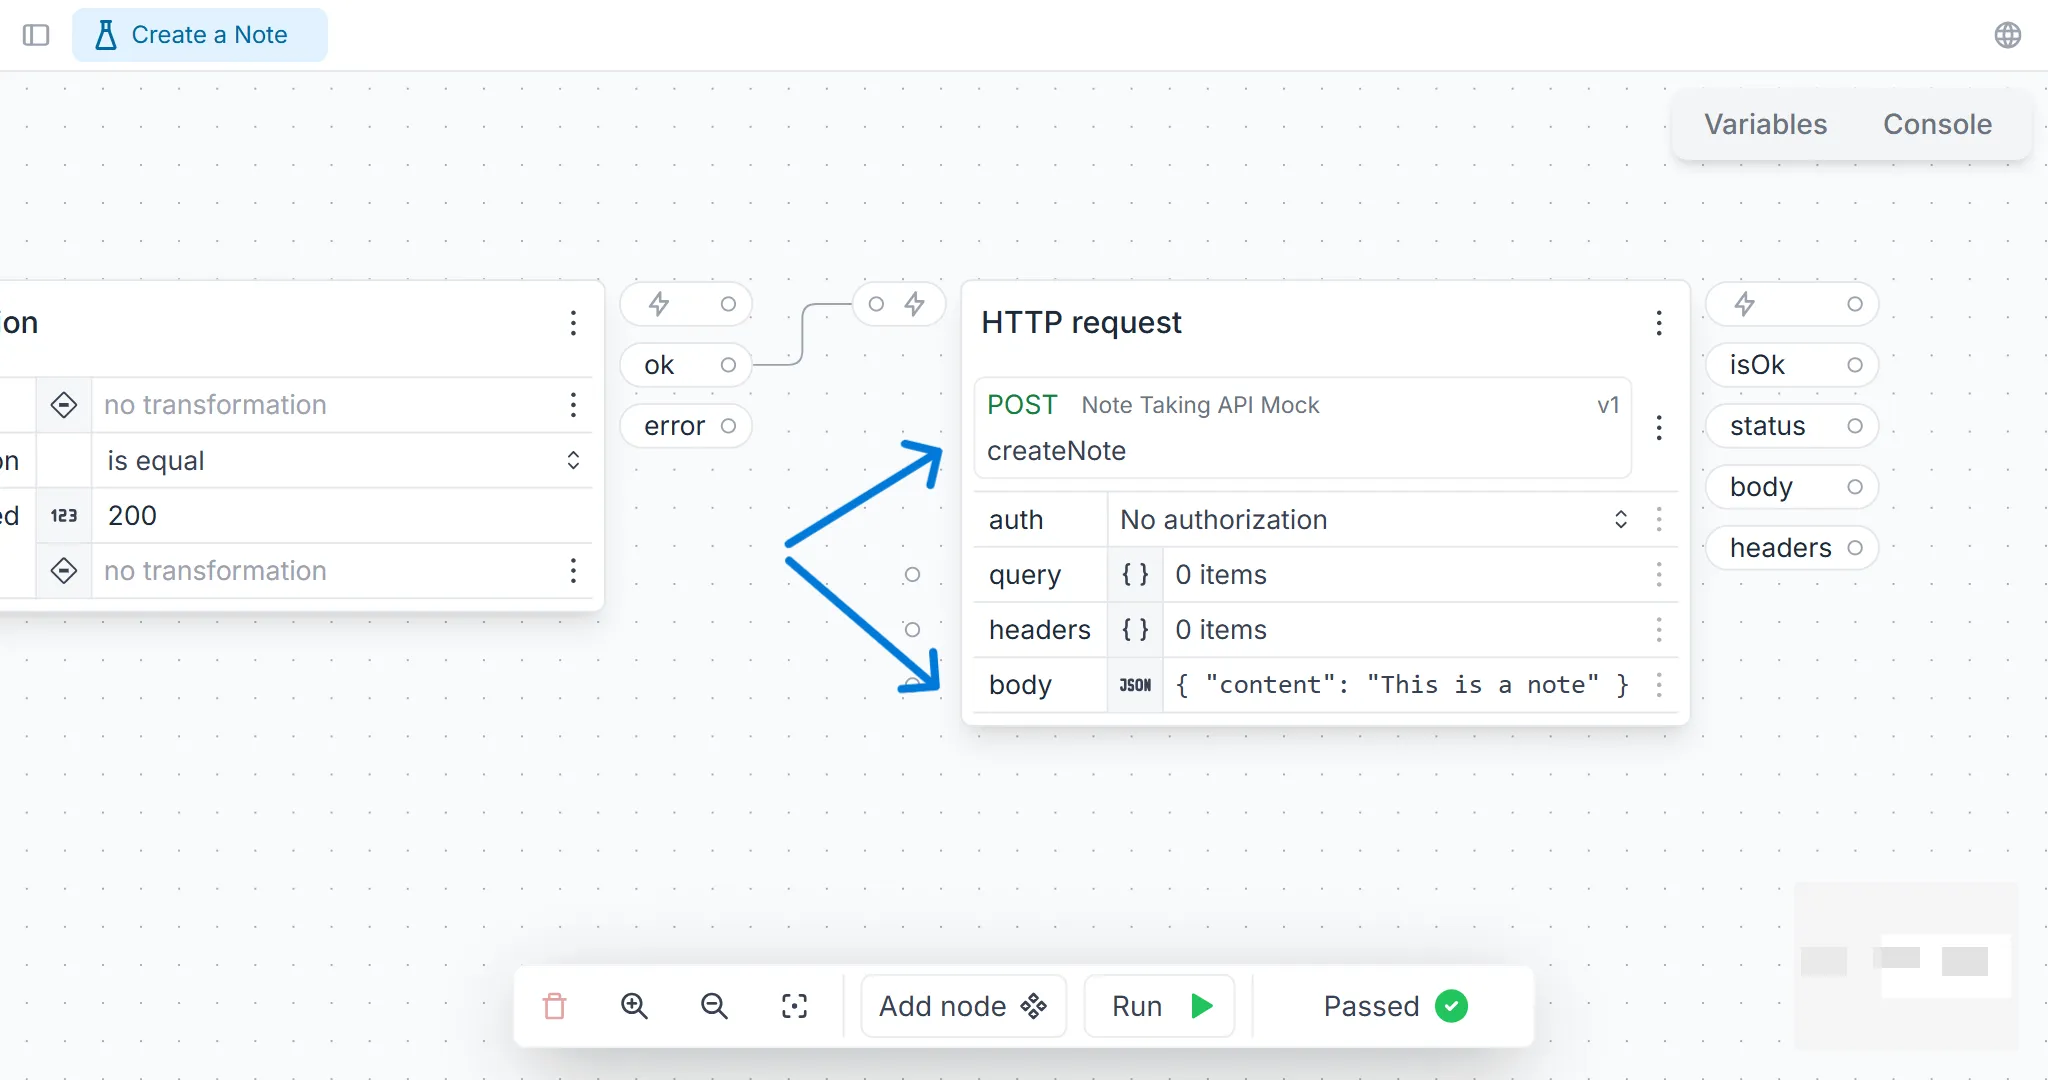
Add an HTTP request node to the test and select the createNote operation of the Note-Taking API Mock. This operation accepts JSON with a property content:
{ "content": "This is a note" }To send this request only if the register request is successful connect the validation’s ok output with the execute input (lightning icon) of the createNote request.
2. Configure authentication
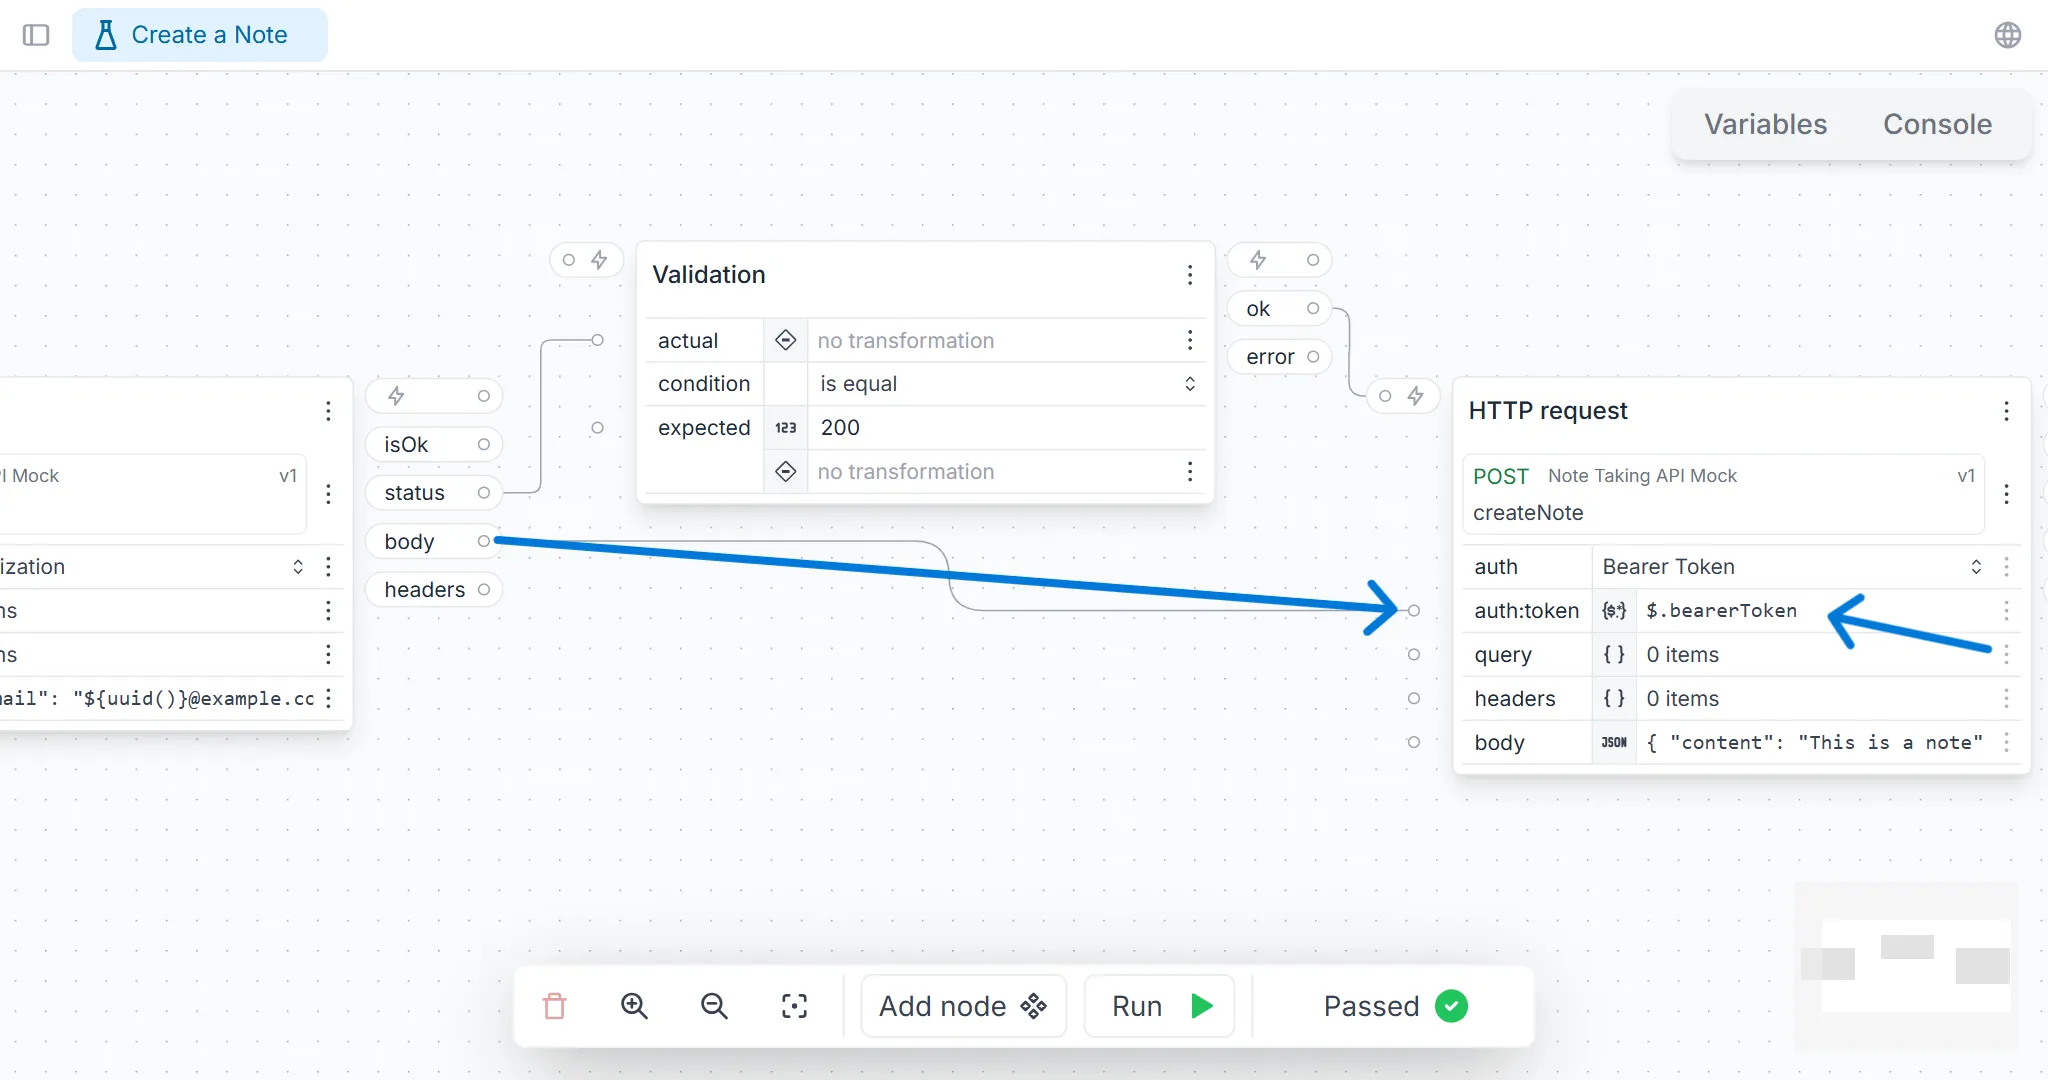
Almost all endpoints of the Note-Taking API Mock requires the user to be authenticated. To do this, select the Bearer Token authentication. Then connect the register request’s body output with the createNote request’s auth:token input. And finally, use JSON path transformation $.bearerToken to extract the bearer token.
3. Validate the createNote response
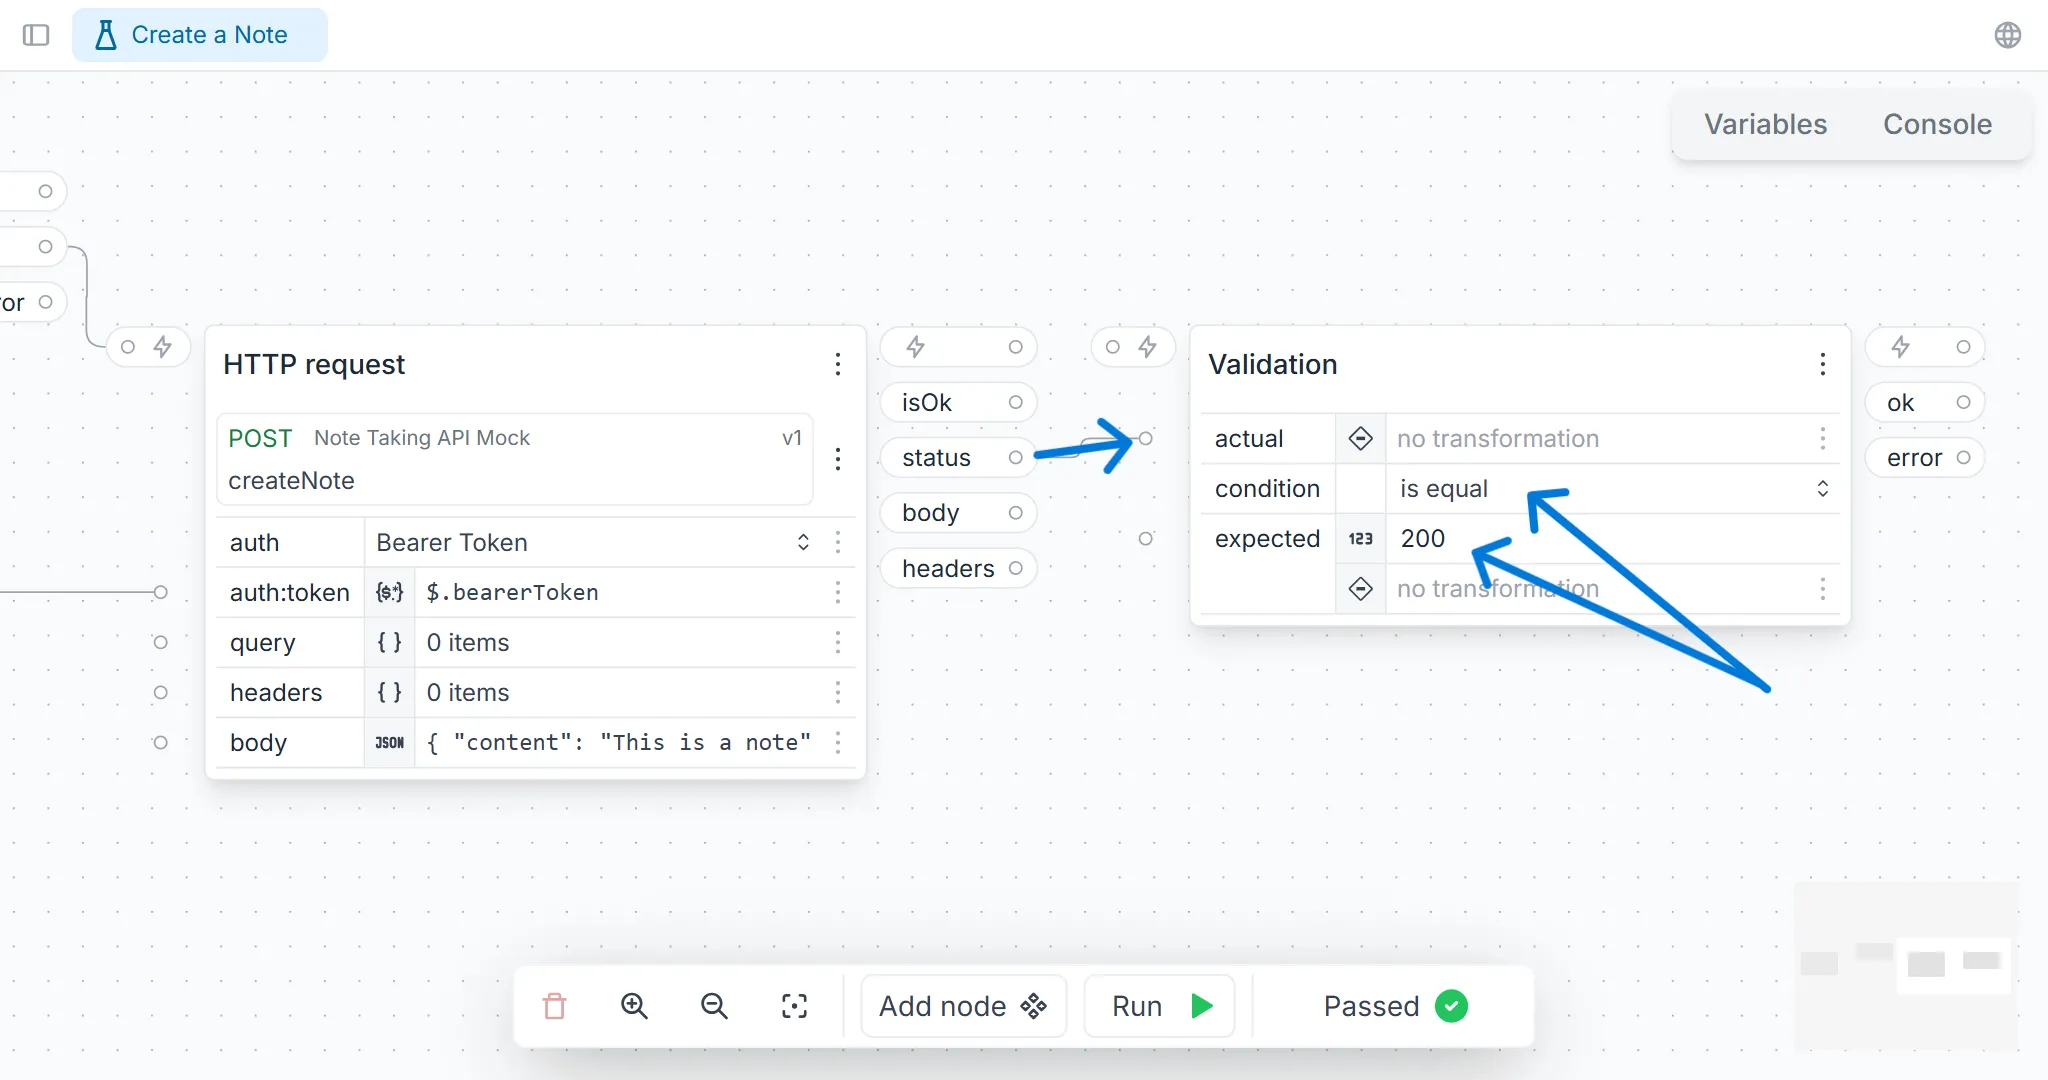
Add a validation node and configure it the same way as in the previous tutorial. The easiest way to do it is just to clone the existing validation node. Click the menu button (three dots in the node header) and select Clone node.
4. Add an HTTP request to get all notes
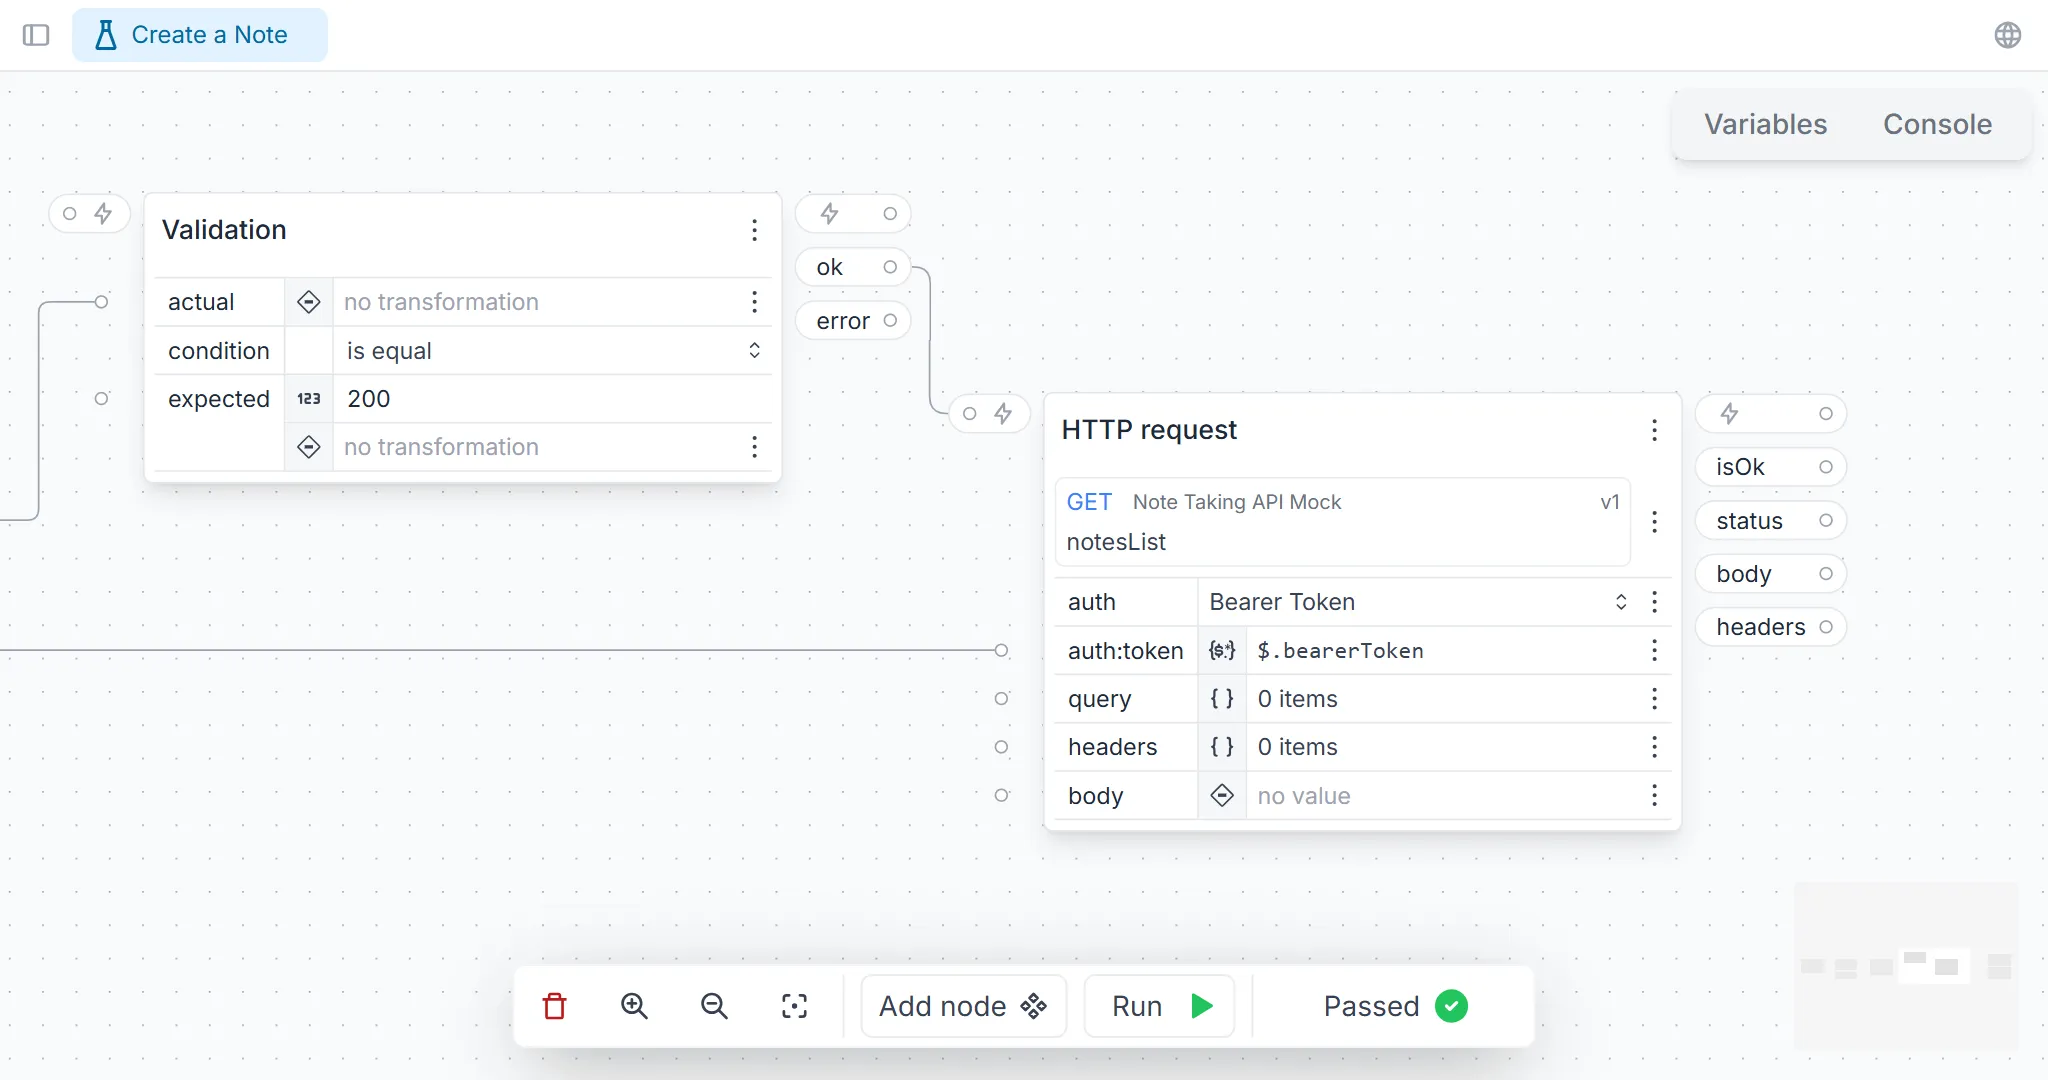
Add an HTTP request node to the test and select the notesList operation of the Note-Taking API Mock. Add authentication same way as in configure authentication step.
5. Validate the notesList response

Add a validation node to validate that status code is 200.
Add another validation node to validate that the response body contains the note created in the previous step. Select the includes condition and set the expected input to be the following JSON:
{ "content": "This is a note", "id": 1 }Set parse JSON transformation for the actual and the expected inputs.
6. Run the test
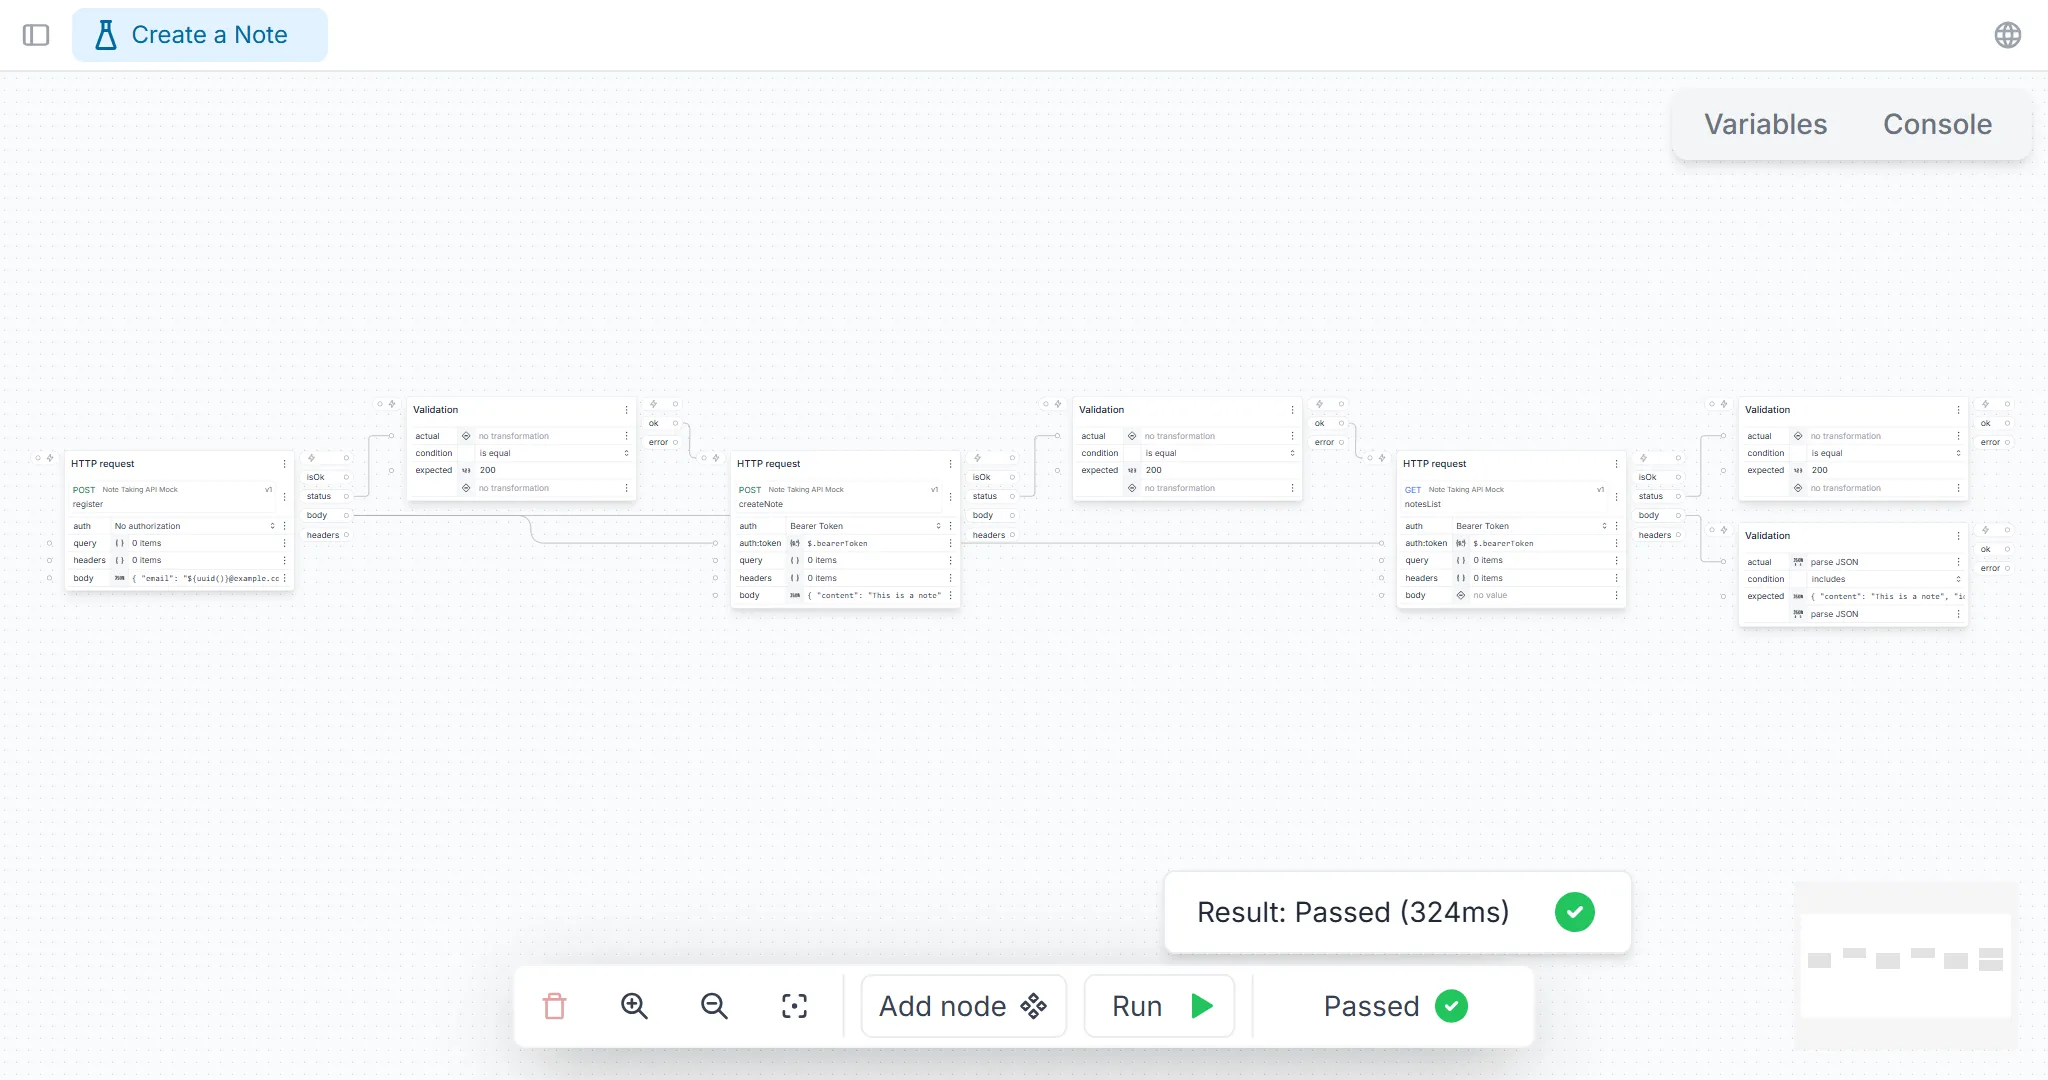
At this point everything should be ready. Run the test and see that it passes.